1.1. Please activate X100 PAD2 on CnAutotool before you use it to test vehicles.

1.2. Input activation code (on the manual cover), product serial number (each device will have a serial number and activation code), nickname (workshop’s name or user’s nickname), login account (can be your email address or cell phone number) and password, the system will then save it. Activation is a one time process. The diagnostic application will start after activation.
2. X100 PAD2 Main Interface and Functional Buttons Descriptions
2.1. Main Interface
Tap on Xtool Scanner X100 PAD2 application icon, the main interface and sub-menus will be shown as below.


2.2. Sub-menus and Function Buttons

2.3. Toolbar Function Buttons

3. Vehicle Connection Diagnosis
3.1. Vehicle Connection Test
a. Connect scanner and vehicle with cable in following order: ? ? ?
b. Switch on the ignition and turn on Xtool X-100 PAD II, then tap on X100 PAD2 application icon to test vehicles. (Shown as follows)

① X100 PAD2 Mainframe
② Main Test Cable
③ OBDII Connector
④ Vehicle
3.2. Precautions before Use
3.2.1. The vehicle power supply has to meet the normal voltage limits DC 9-15V
3.2.2. Users should check the position of the DLC port and ensure the OBDII 16pin connector and the DLC port are correctly aligned before attempting to connect.
3.2.3. When taking some special functions tests, users are required to operate the device according to operating instructions. For vehicle, it has to strictly meet the requirements, for example, the conditions that some vehicle models need to be reached are as follows: engine temperature 80℃/105℃, turn off the loads (such as headlights, air-conditioner, etc.), put accelerator pedal in released position, etc.
3.2.4. If users can not find the tested vehicle model or electronic control system in the X100 PAD2 test menu, they may need to update the software or consult Xtool technical service department.
3.2.5. Please ensure that only official XTOOL cables and connectors are used to prevent damage to the unit.
3.2.6. Before powering off the unit, please ensure that you cancel or complete the current task or function and return to the main interface, then power off.
3.2.7. Do not excessive force to operate the touch screen.
3.2.8. During long period of non-use, please disconnect the power and turn off the X100 PAD2 unit.
4.Special function and Diagnosis
4.1. Menu Options
4.1.1. After the X100 PAD2 mainframe is connected to the vehicle via main test cable, Immobilization can be performed. The Immobilization interface is shown as below:

4.1.2. X100 PAD2 lists mileage adjustment separately. The Odometer Adjustment interface is shown as below:
.

4.1.3. Users can choose the relevant menu for the vehicle being tested: selection for Europe will enter the European cars menu, selection for Asia will enter the Asian cars menu, selection for America will enter the American cars menu.

4.1.4. Besides the usual system diagnostic functions, XTOOL also has developed a series of special diagnostic functions for certain vehicles as follows:
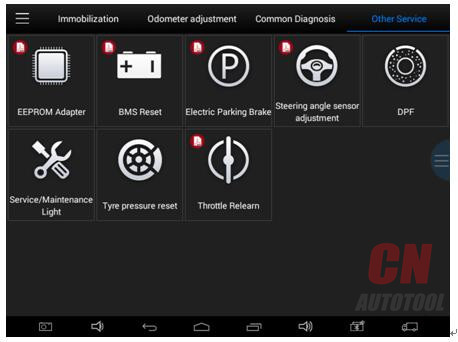
4.2. Test Functions: it can check 4 systems for the vehicles (Engine, ABS, Airbag, BCM)
4.2.1. Using VW as an example, select Diagnosis, then select EUROPE. Choose the VW logo. If the logo is not showing on the screen, please swipe up or down to display it.
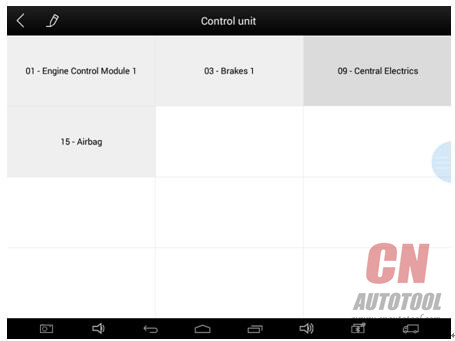
PLEASE NOTE: Different vehicles have different menus and systems.
Common main function menu includes the following options:
Read ECU: This function is to read the ECU version information, which is the equivalent of “System Identification” or “System Information” in some electronic control systems.
This will allow you to read ECU related software and hardware versions, models and production date of diesel engine, part number, etc.
Read DTCs: read the trouble codes that are stored in the ECU.
Clear DTCs: clear current and historical trouble codes memory in ECU. The trouble codes can not be erased without eliminating the fault that the code relates to. TIP: Save or print the currently stored fault codes before clearing them to provide help in the case of an intermittent fault.
Read Live Data: This will allow you to read the parameters of the system being interrogated, such as oil pressure, temperature, engine speed, fuel oil temperature, coolant temperature, intake air temperature, etc.
4.2.2. Toolbar function buttons descriptions
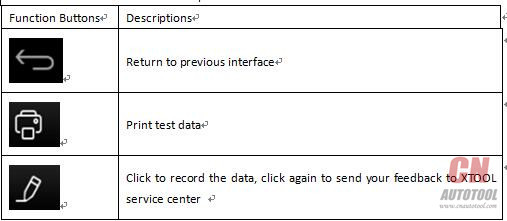
Click to record the data, click again to send your feedback to XTOOL service center
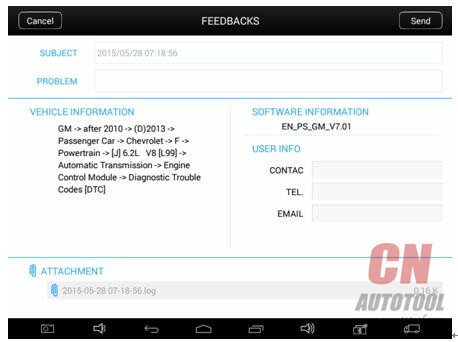
After clicking the data record button the second time the data feedback page will appear as shown below, showing diagnostic software version, vehicle being tested, and the steps performed in the diagnostic process. Users can then enter the nature of the problem and any other relevant information and send the form to the Xtool engineering department.
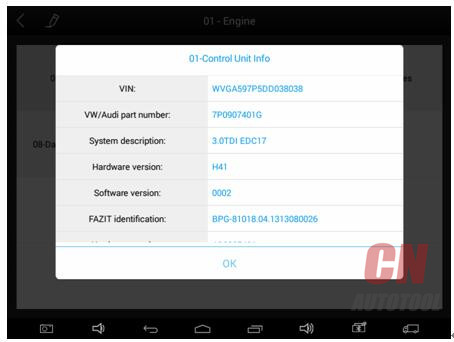
4.3. Read ECU
This function is used to read ECU version information, which is the equivalent of “System Identification” or “System Information” in some electronic control systems.
This will allow you to read ECU related software and hardware versions, models and production date of diesel engine, part number, etc. shown below:
4.4. Read DTCs
Select Read Fault Codes to read the trouble codes stored in the ECU. The screen will show the trouble codes and their definition, shown below:
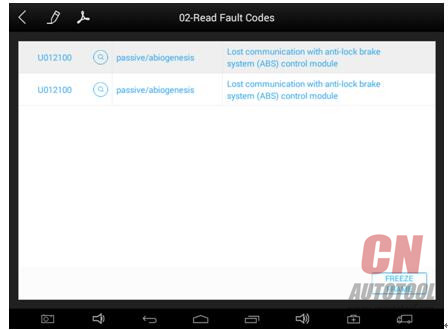
Tip: In the process of diagnosis, if the device shows “System is OK” or “No Trouble Code”, it indicates that the ECU has not detected a fault in any of the circuits that it monitors. If there is a fault which is not being recorded it may be that the fault is with a part of the system not under the control of ECU, such as a mechanical system fault. It is also possible that the signal of a system sensor may be incorrect but still within the ECUs stored limits, this can be verified in Live Data.
4.5. Clear DTCs
4.5.1. Return to the previous step, select Clear Fault Codes to clear the current and historical trouble codes memory in ECU. Performing this function will clear all the current and historical trouble codes. Please ensure that the trouble codes have been recorded before clearing, shown below:
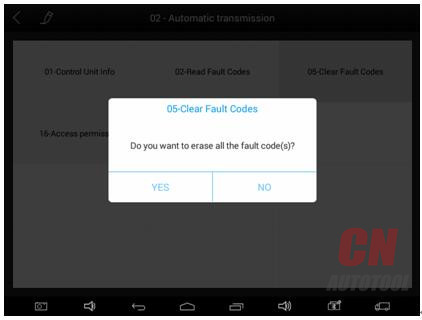
4.5.2. Click YES to confirm the operation, if the communication is normal, it will show “Trouble Codes Successfully Cleared” or “Trouble Codes Cleared”. Generally, users will need to re-read trouble codes after clearing them to confirm that the trouble codes have been cleared.
4.6. Read Live Data
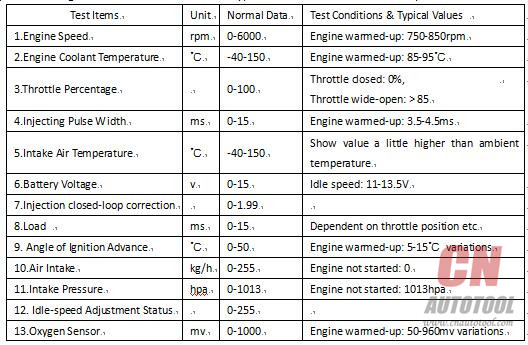
System control units or ECUs send out operating parameters and working status of various components in the form of an Electronic Signal, here Electronic Signal refers to Live Data. Common Engine Live Data includes Engine Speed, Throttle Position Sensor Voltage, Oxygen Sensor Voltage, Coolant Temperature, Spark Advance Angle, Idle Speed Switch State, Intake Air Temperature, Intake Pressure, etc.
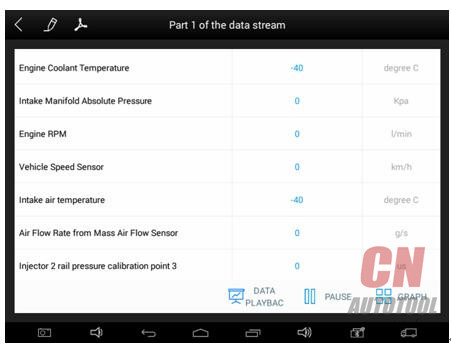
Tip: Live Data is important function that can be used to help technicians further diagnose a problem. This function requires technicians to be familiar with sensor data of each system, control signals and control modes. Tip: Save known good live data readings for comparison.
(The following are some test conditions and typical values of common live data)
Display Modes
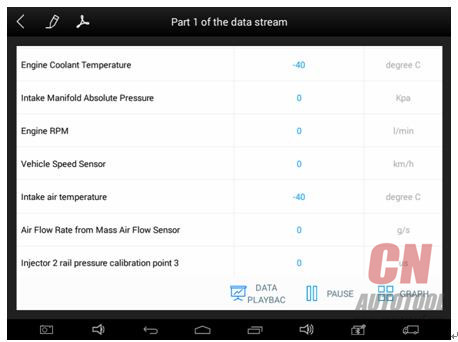
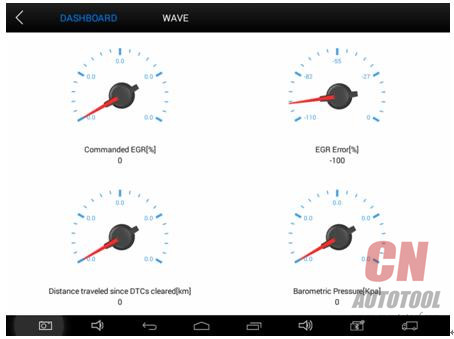
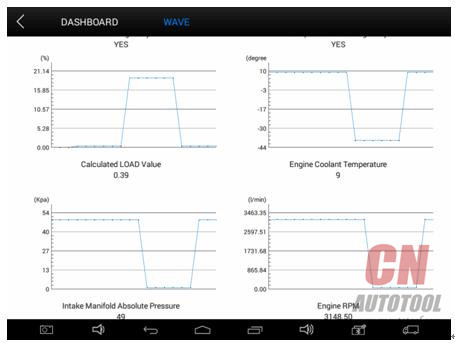
There are three modes with which to view Live Data, users can choose the optimum mode according to their own needs and different parameter types.
Digital Mode: Displays parameters in numerical form.
Dashboard Mode: Displays parameters in the form of simulated instrument graphics.
Graph Mode: Displays parameters in graph form.
5. Settings
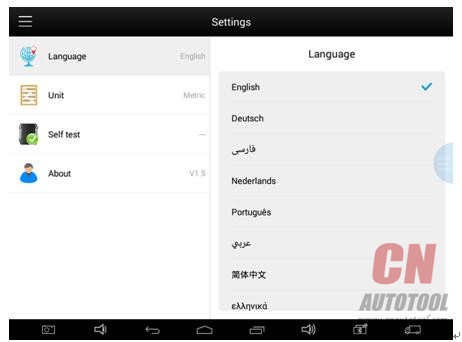
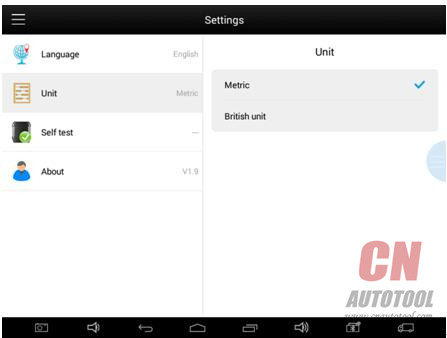
By selecting Settings users can set the language, unit and other system related options:
Languages: select the language. Please tick the required option from the multi-language options on the right.
Units: Select unit of measurement. Users can select Metric or British Unit.
6. XCloud (English version is coming soon)
All the auto maintenance technicians who use our products can not only look up the maintenance information that we put on our cloud service platform conveniently, and combine the diagnosis result to query, and communicate with other Xtool users in our forum, but can also access various online databases of maintenance and diagnostic skills and vehicle maintenance plans.
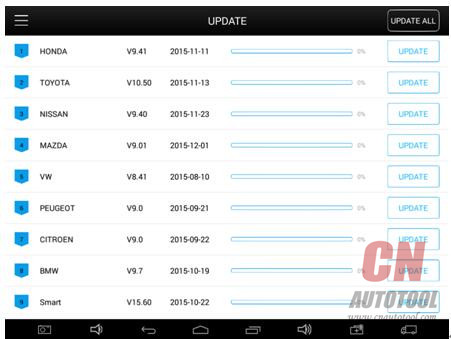
7. Update
X100 PAD2 updates directly via the Internet using WiFi or wired connection. To access the update application open the X100 PAD2 application and click UPDATE , shown below:
没有评论:
发表评论